

Create a CV/Resume Builder using the Django Rest Framework (part 4)
building resumes (CVs) as downloadable PDFs.

Good things take time
~ unknown
Introduction
In this article, the design of the Django Rest Framework and the function of the view in MVT are covered in-depth (Model-View-Template). We'll finish the API for our CV/resume builder. At the end of this tutorial, we will be able to download resumes as PDFs. You can use the Github repository for this tutorial.
What is an API?
An API is simply you writing the backend (database, request, and server interaction) code without necessarily knowing the frontend. It has to do with providing routes (URL paths), such as www.example.com/signup/, that any type of frontend tool can use in their own app and expect it to work properly. A React developer, for example, might use the www.example.com/signup/ link to create a user signup page.
The same link can be used by a Vue or Angular developer to create a user account for those people, regardless of the frontend technology used. APIs are extremely powerful because they extend beyond frontend developers because mobile app developers can use the same route and it works as expected.
It is not necessary to write the same backend code in Python and then rewrite it in Javascript for a React, Vue, or Angular developer to be able to access that route. Or for a mobile app developer, rewriting in Java or Kotlin. APIs are unaffected by the technology used to access the API routes. API routes are commonly referred to as endpoints or API endpoints. These API endpoints are typically represented in JSON.
APIs fully separates the backend logic from the frontend
The Django Request Cycle
We'll picture how the HTTP request cycle works in Django. When you enter a URL, such as https://localhost:8000/admin/, the first thing that happens in our Django project is that a URLpattern (in the root/parent urls.py, then through children urls.py files) matching the address /admin/ is found. A view is specified by the URLpattern. The view then retrieves the endpoint's content from the database and uses a serializer to render the JSON response.
Typically, creating APIs with the Django Rest Framework entails sending a JSON response to the called endpoint based on its request. Django apps' views.py file contains the code that processes the logic that will be returned.
The Django Rest Framework Serializers
Serializers are fancy terms for converting a Django model object (an instance) to JSON. In this case, converting a Django model object to JSON. Deserialization is the opposite of serialization, converting a JSON response into a Django model object.
A file called serializers.py is commonly found in a child app. Dealing with the JSON-Model transformation is typically done before writing code in views.py.
One can think of the Django Rest Framework serializer as equivalent to Django's form.
Serializer types
Serializer types, like Django model and form types, represent data types in Python. Here are some examples:
- Characters: serializers.CharField()
- Integer: serializers.IntergerField()
They are clearly modeled after Models and Forms declaration types.
Serializers also inherit from different types, one of the most popular is the serializers.ModelSerializer which binds to a model and the serializers.Serializer which is a base class for serializers.
The ModelSerializer class provides a shortcut that lets you automatically create a Serializer class with fields that correspond to the Model fields.
The ModelSerializer class is the same as a regular Serializer class, except that:
- By default, it generates a set of fields for you, based on the model it is bound to.
- It automatically generates validators for the serializer, such as unique_together validators.
- It includes simple default implementations of
.create()and.update()methods which can be overrode by you.
For our CVeate application, we will use serializers.ModelSerializer extensively.
The Django Rest Framework Views
Django Rest Framework (DRF) is a Django framework dependency. It was created to make creating Web APIs with Django easier.
It incorporates Django's design architecture into its own development while also providing an easy-to-use interface for creating APIs.
pip install djangorestframework
To begin, we must add the Django Rest Framework to our INSTALLED APPS in settings.py to inform Django that we will be using it:
...
DEBUG = True

ALLOWED_HOSTS = []


# Application definition

INSTALLED_APPS = [
    'django.contrib.admin',
    'django.contrib.auth',
    'django.contrib.contenttypes',
    'django.contrib.sessions',
    'django.contrib.messages',
    'django.contrib.staticfiles',

    # 3rd party apps
    'rest_framework',  # new

    # Local apps
    'cv',
]
...
Writing CVeate serializers
Create a new file called serializers.py and import both the models from CV app and the serializer module from the Django Rest Framework into it.
from rest_framework import serializers
from cv import models
We use the ModelSerializer to create a relationship between the models and the serializer.
class ResumeSerializer(serializers.ModelSerializer):
    class Meta:
        model = models.Resume
        fields = '__all__'
The serializer is instructed which models and fields to serialize (convert to JSON format) and deserialize using the class meta parameter (convert from JSON format to Django Model field values)
One option is to use exclude, which prevents selected field names from being rendered to the API endpoint. Instead of using __all__, fields can have a list of field names. For instance:
class ResumeSerializer(serializers.ModelSerializer):
    class Meta:
        model = models.Resume
        exclude = ['user', 'created_at']
Any CRUD action on the Resume API endpoint will not display the user and created at fields (or wherever the serializer is used in the views file).
For the other CVeate models, we create serializers as follows:
Creating CVeate Views
We will start with the 'Resume' model's view in our CV/Resume Builder project titled cveate. A user can create, delete, edit, and get their resumes using our software, as described in Part 1.
Django Rest Framework has a module in views, similar to model and serializer.
In cv/views.py,
Function-based View VS Class-based views in the Django Rest Framework
Typically, the original design of Django involved just the use of functions to perform the Django request cycle we discussed earlier.
An example of function-based view:
from django.http import HttpResponse
from rest_framework.parsers import JSONParser

from cv.models import Resume
from cv.serializers import ResumeSerializer

def resume_list(request):

    '''List all resumes, or create a new resume
    '''

    if request.method == 'GET':

        resumes = Resume.objects.all()

        serializer = ResumeSerializer(resumes, many=True)

        return HttpResponse(serializer.data)


    elif request.method == 'POST':

        data = JSONParser().parse(request)

        serializer = ResumeSerializer(data=data)

        if serializer.is_valid():

            serializer.save()

            return HttpResponse(serializer.data)

        return HttpResponse(serializer.errors, status=400)
In the above function-based view, the function performs both a GET (listing all resumes) and a POST (new resume creation) request based on Http method from the request.
Using function-based repeatedly for code that performs simple CRUD actions were decided redundant, hence the introduction of Class-based views (CBV) which performs these mundane repetitive tasks.
An example of class-based view:
from rest_framework import viewsets

from cv.models import Resume
from cv.serializers import ResumeSerializer


class ResumeViewset(viewsets.ModelViewSet):

    """Create, Read, Update and Delete a single resume by ID. List all resumes"""
    queryset = Resume.objects.all()
    serializer_class = ResumeSerializer
Less code lines are needed for the snippet of code above. Behind the scene, DRF does the magic (our favourite fairy 🧚🏽).
Views are typically where application logic is implemented. When it comes to handling application logic, there are various schools of thought. The debate is usually between Fat-model/Thin-view and Thin-model/Fat-view. Some teams prefer models that contain the majority of the application logic (Fat-model), whereas others argue that the majority of the application logic should be contained in the views (Fat-view). That is entirely up to you (and your team). This tutorial, however, will concentrate on the Thin-model/Fat-view and Class-based view approaches.
For our resume, we would follow the logic below:
- Allow users see all available resume templates
- Only allow users access to their own resumes. To do this, they need to be authenticated (and authorized) to only their own resumes.
- Only download their own resumes.
Let's code the logic for allowing all users to list all available resume templates. In cv/views.py, add the following:
from rest_framework import viewsets

from .models import ResumeTemplate
from .serializers import ResumeTemplateSerializer


class ResumeTemplateViewset(viewsets.ModelViewSet):

    """
    list: List all resume templates,
    retrieve: Get a single resume template by ID.
    """
    queryset = ResumeTemplate.objects.all()
    serializer_class = ResumeTemplateSerializer
    http_method_names = ["get"]
We introduced http method names in the code snippet above. ModelViewSet by default offers shortcuts to all HTTP methods (POST, GET, PATCH, PUT, DELETE). However, in the example above, we only allow GET as an HTTP method. The logic of the views is thus restricted to returning either all resumes or just one resume by ID.
To see this in action, we update our cv/urls.py as shown below.
from rest_framework.routers import SimpleRouter

from cv import views

router = SimpleRouter()

router.register("templates", views.ResumeTemplateViewset, basename="templates")

urlpatterns = router.urls
The code snippet above uses SimpleRouter to instantiate router, which is a quick way to declare all routes and urls shared by a resource. We are declaring the resume template resource in this instance using a single route that we registered. More information on Django Rest Framework's routing can be found here.
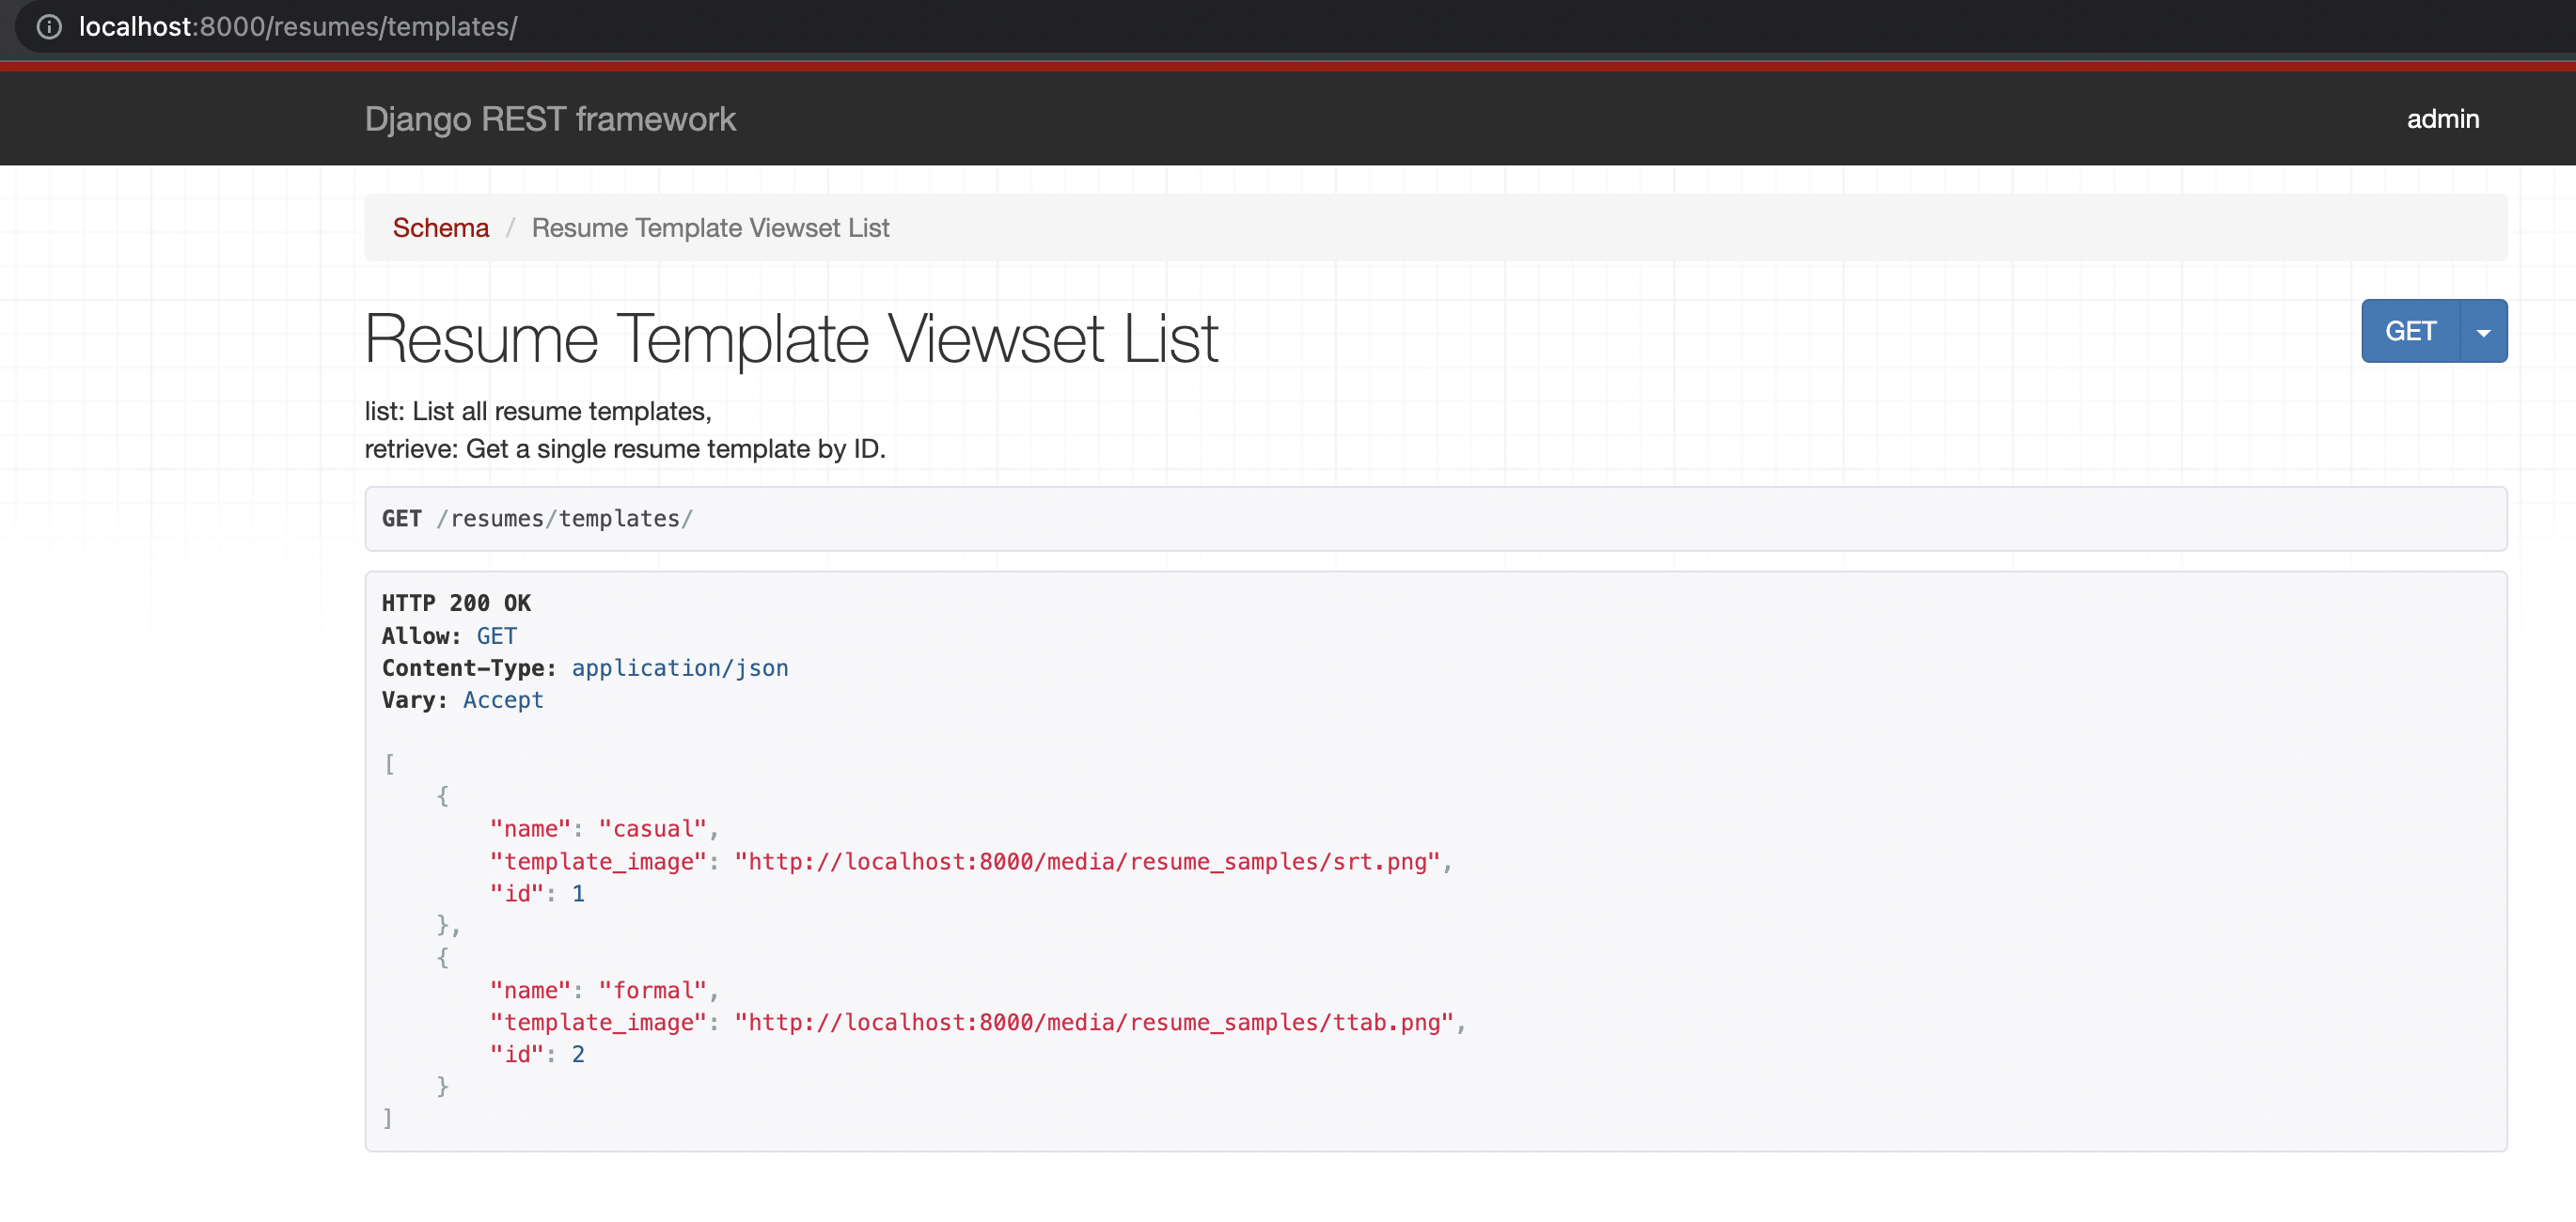
To view the complete list of resume templates, go to http://localhost:8000/resumes/templates/ to access our new API endpoint.
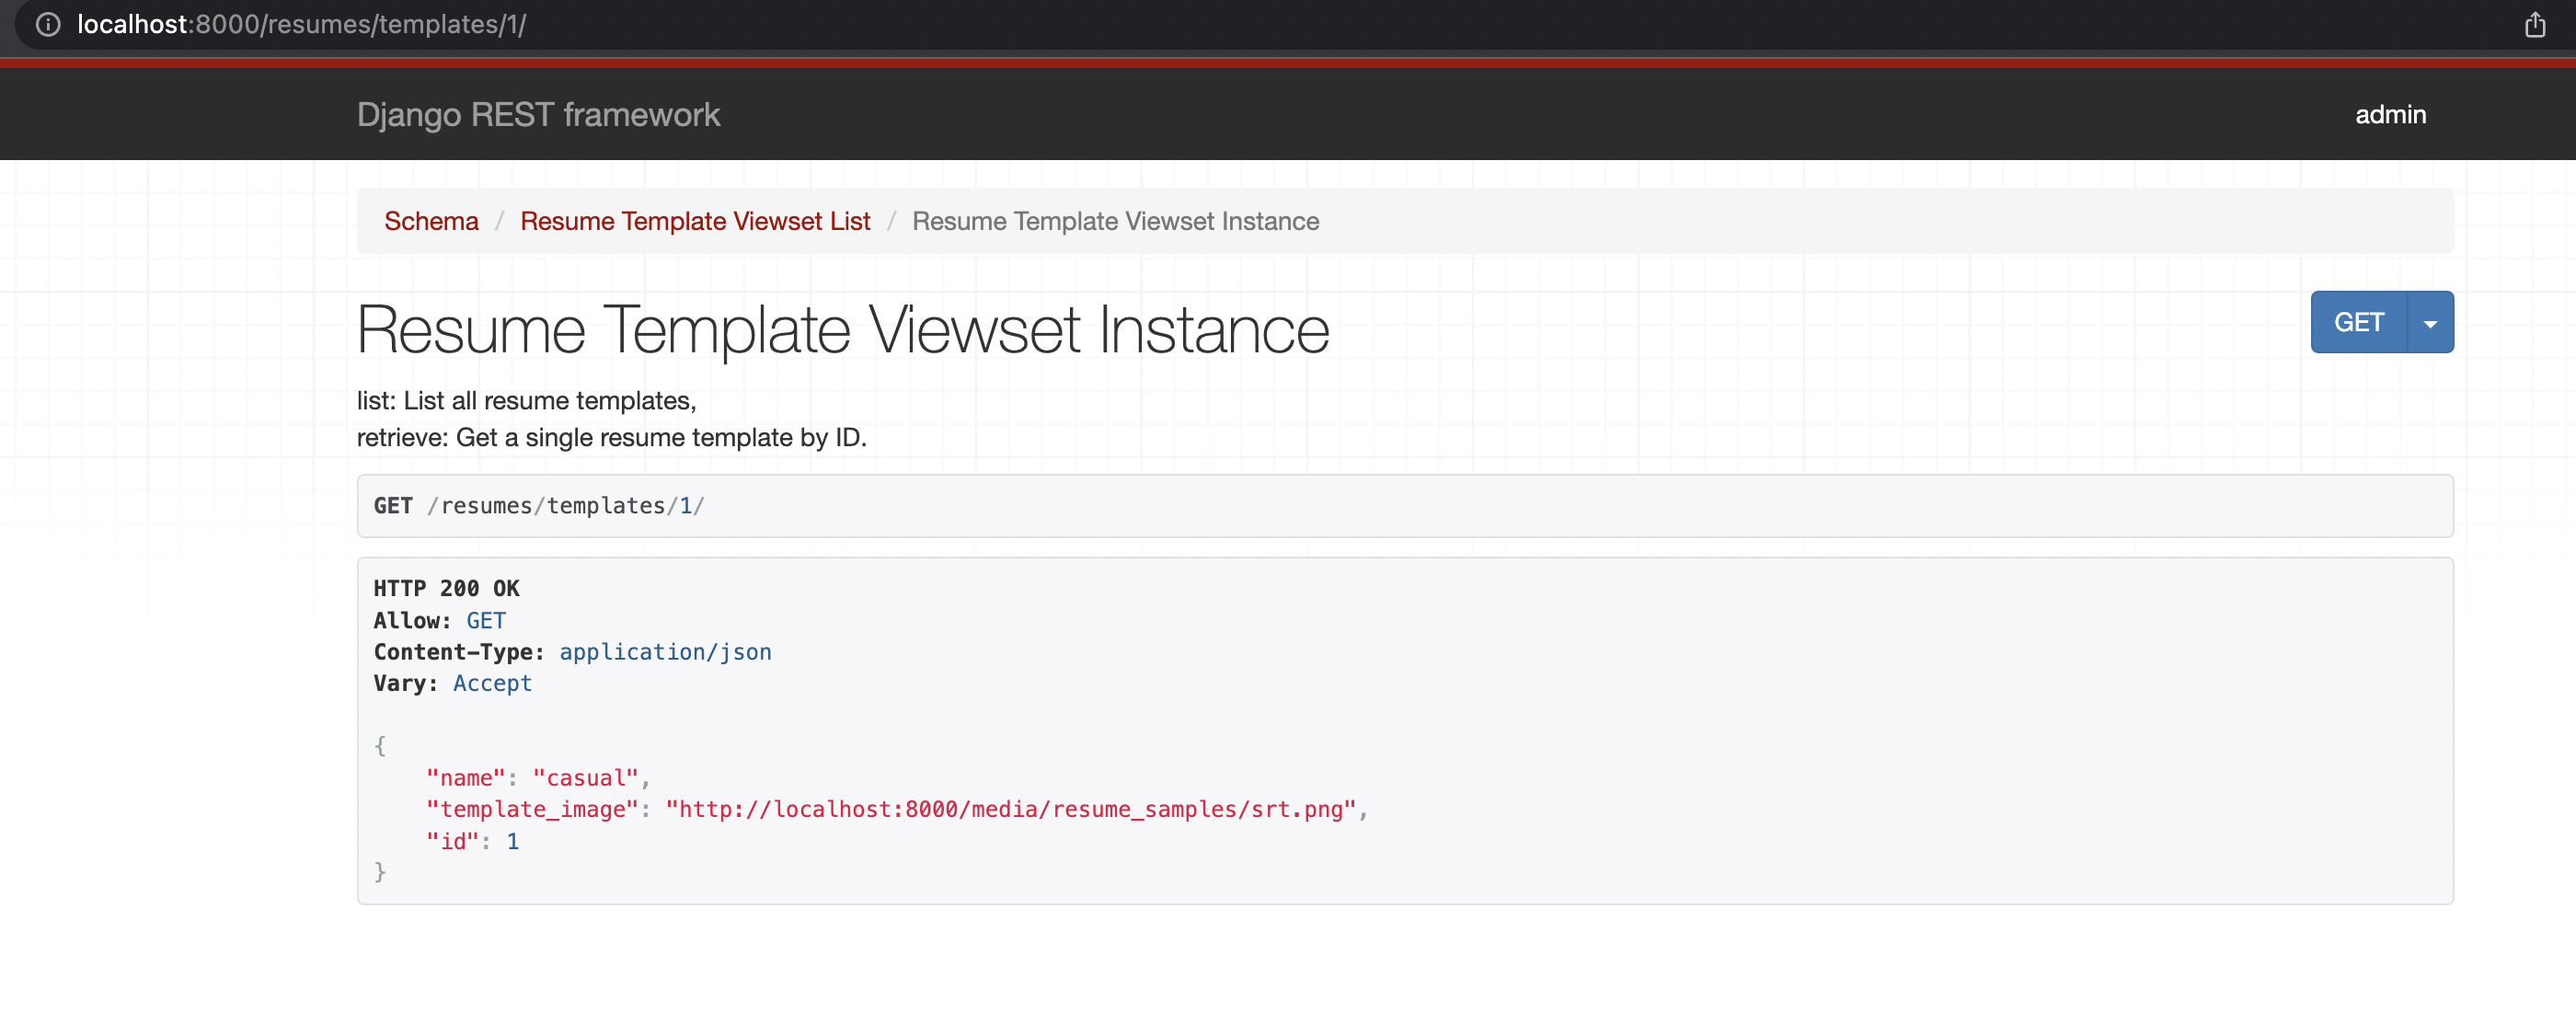
Retrieve a single resume template by ID such as 1, visit http://localhost:8000/resumes/templates/1/ as shown below.
In similar way, we create the API endpoints for resume.
from .custom_permissions import IsOwnerOrAdmin


class ResumeViewset(viewsets.ModelViewSet):

    """
    list: List all resumes belonging to this authenticated user.
    create: Create a new resume as an authenticated user.
    retrieve: Retrieve resume (by ID) belonging to this authenticated user.
    partial_update: Update resume (by ID) belonging to this authenticated user.
    destroy: Delete resume (by ID) belonging to this authenticated user.
    """
    queryset = Resume.objects.all()
    serializer_class = ResumeSerializer
    http_method_names = ["get", "post", "patch", "delete"]
    permission_classes = [permissions.IsAuthenticated]

    def get_permissions(self):
        if self.action != "create":
            return [IsOwnerOrAdmin()]
        return super().get_permissions()

    def get_queryset(self):
        try:
            if not self.request.user.is_staff or not self.request.user.is_superuser:
                return Resume.objects.filter(user_id=self.request.user)
        except Exception:
            return Resume.objects.none()
        return super().get_queryset()
We have a custom permissions file that contains a tailored permission that allows only the resume owner and admins to perform any action. The get_permissions method checks whether the incoming action is a "create" action (HTTP POST request), if it is not, it only permits authenticated owner access. If it is a create action, it enforces that the requesting user is authenticated.
The get_queryset method checks whether the requesting user is not admin. If the user is not an admin, then the resource only returns resumes belonging the that user by filtering against user_id. We raise an exception when an anonymous (unauthenticated user) attempts to use the endpoint and return an empty resume resource (Resume.objects.none()).
The full snippet of code is provided below.
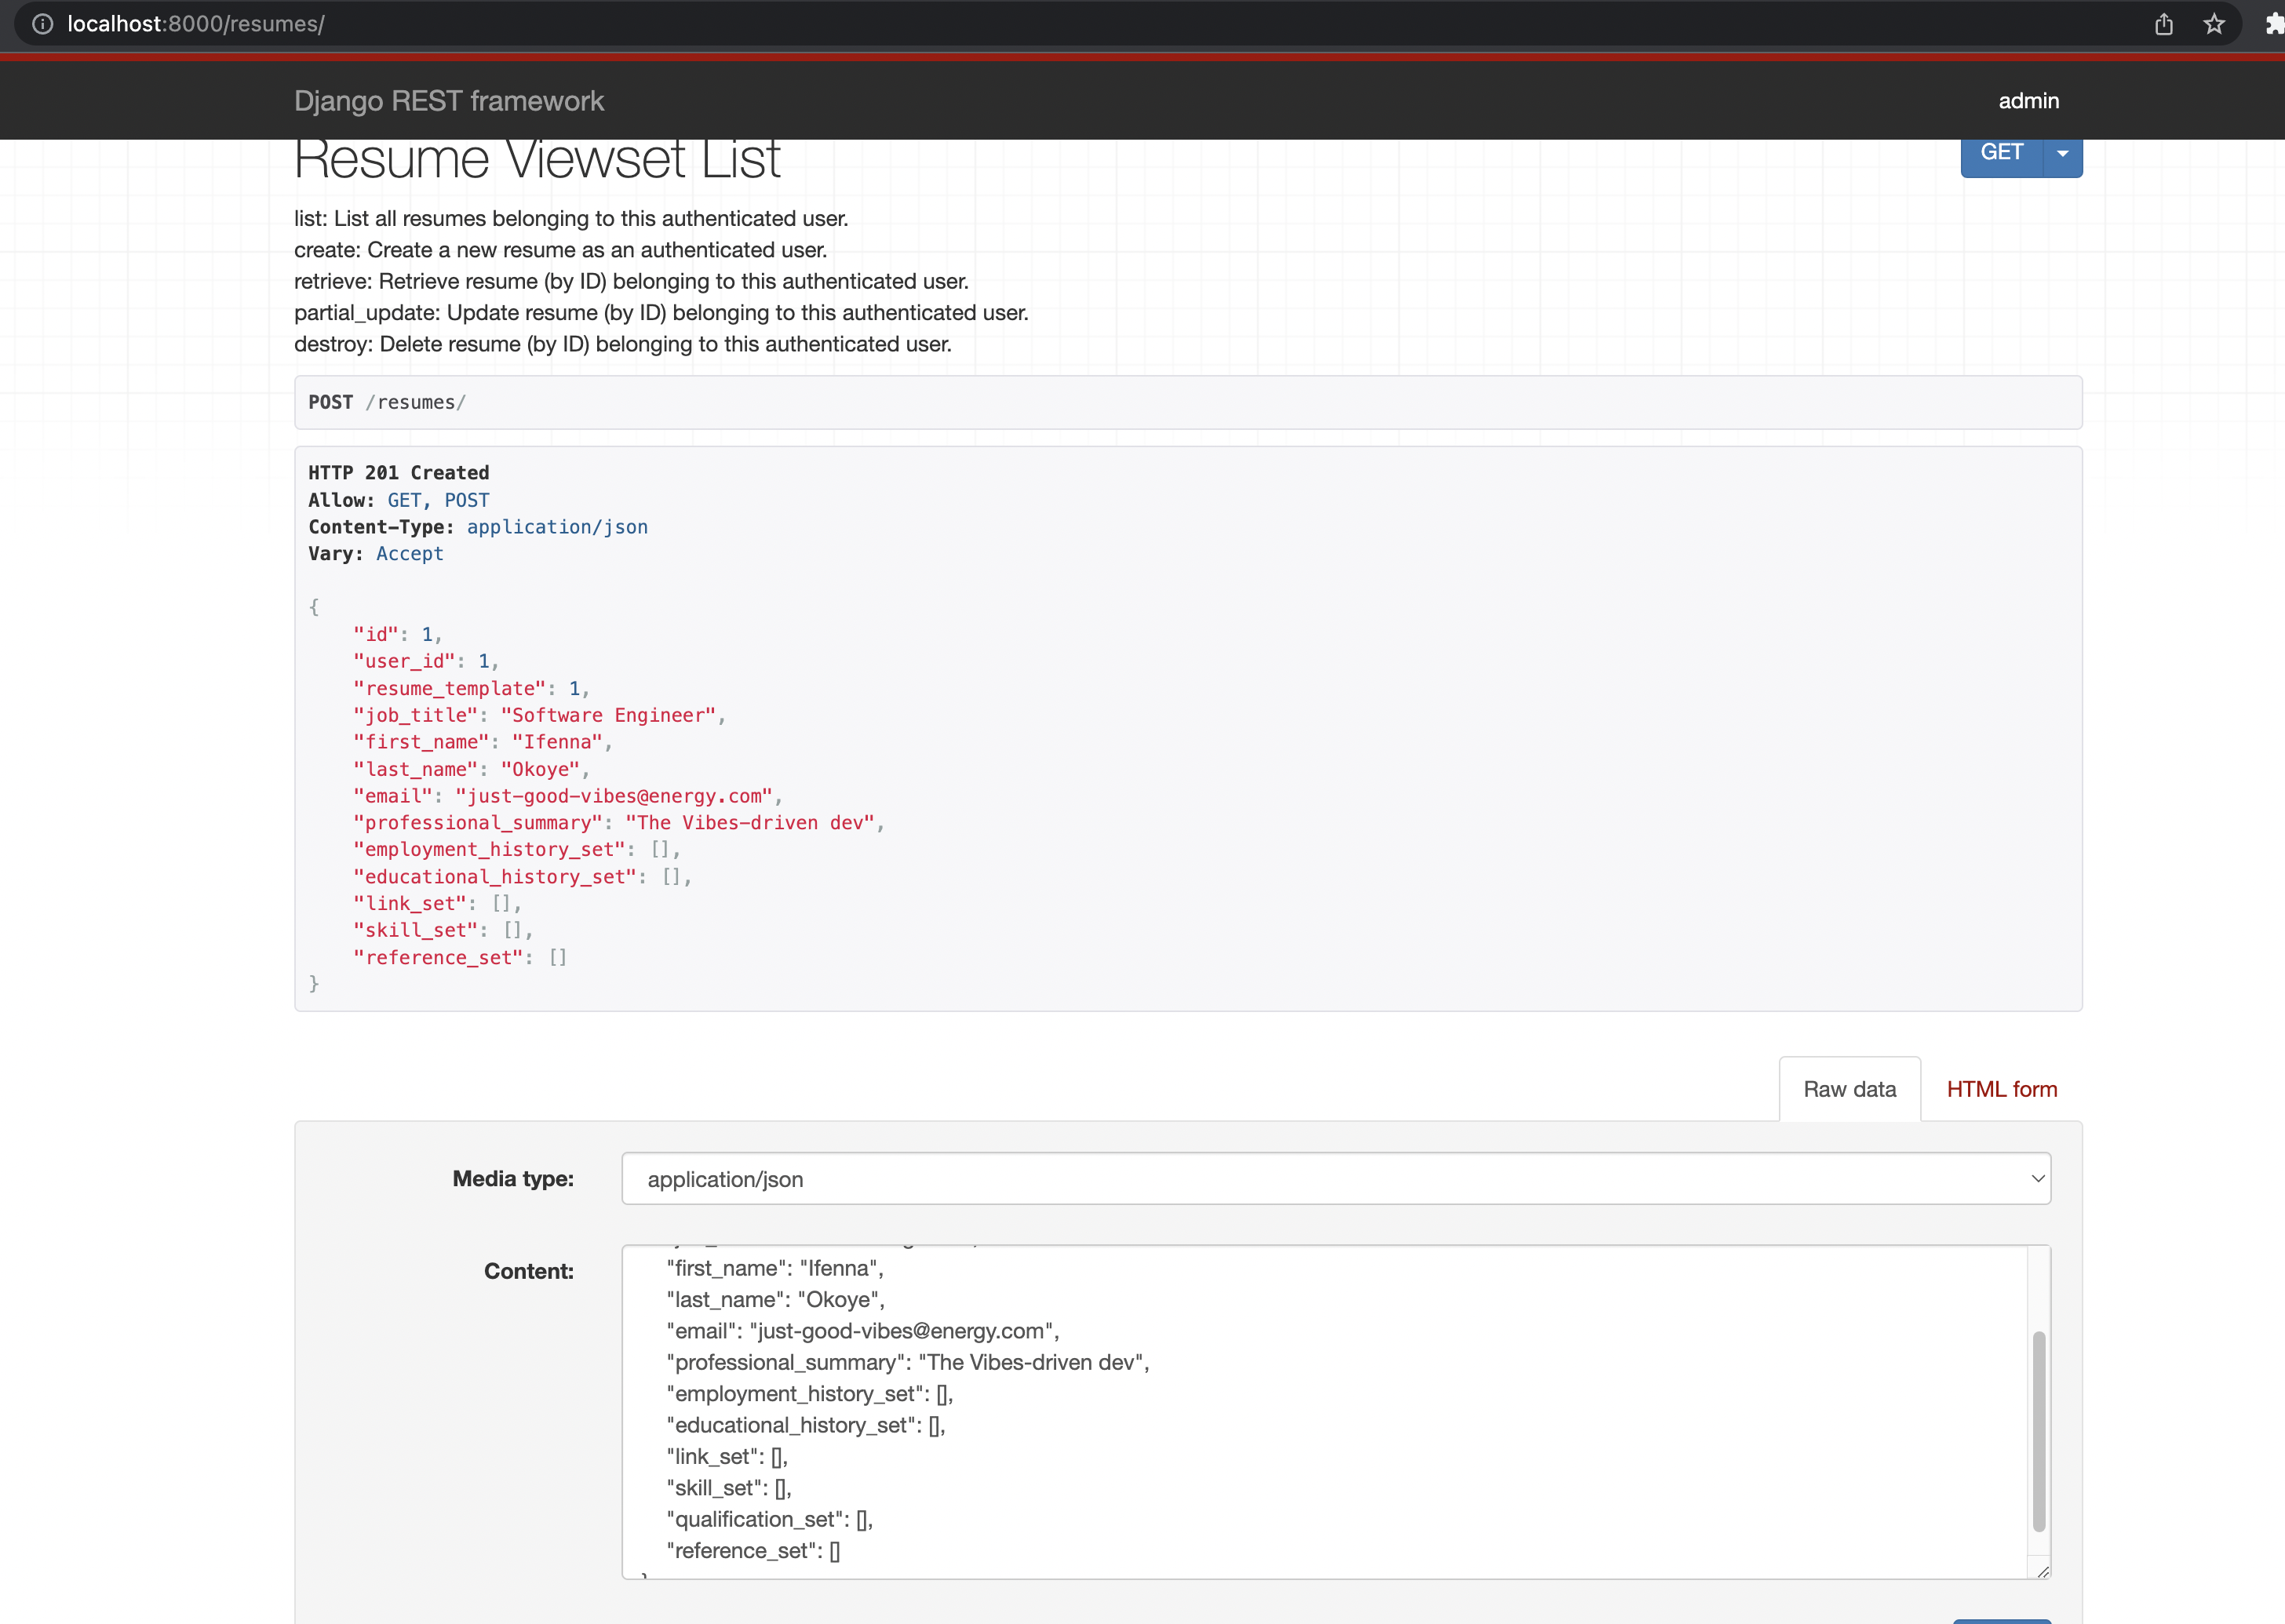
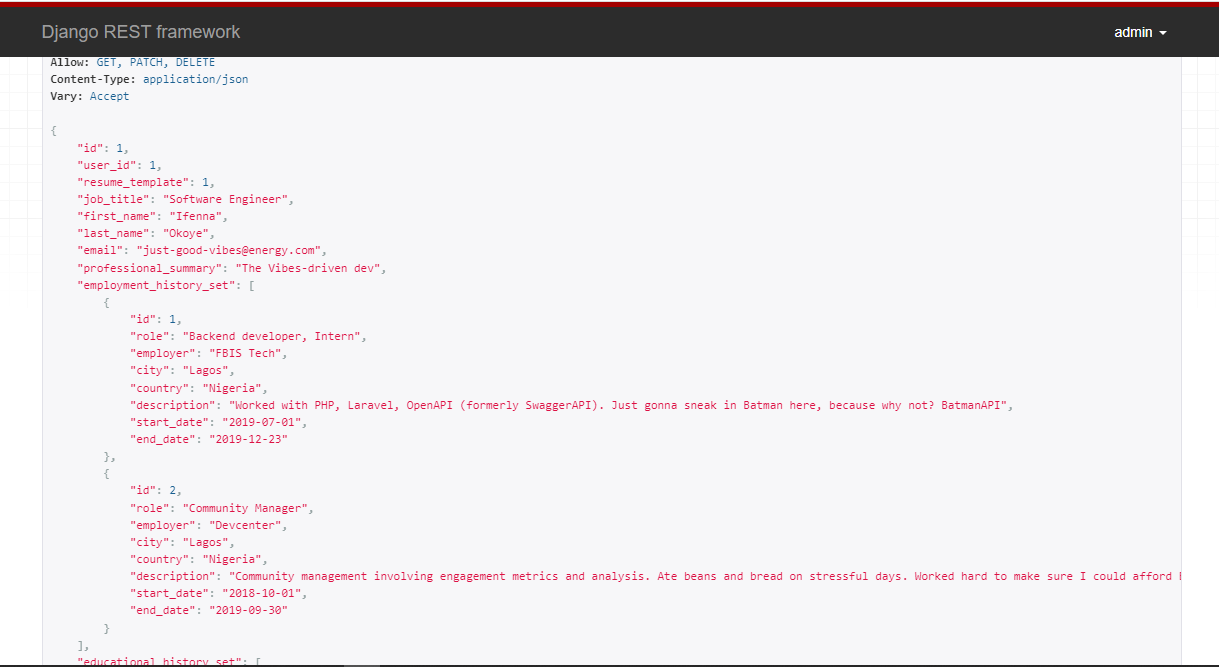
Check out our new endpoint now. Browse resumes at http://localhost:8000/resumes/>.
As an administrator, we are currently logged in. And as you can see below, we were successful in creating a new resume with the resume_template setting set to 1 (casual resume template).
From the admin dashboard (http://localhost:8000/admin/), we can create new users. Ife with user ID 2 and Nna with user ID 3.
To allow browser API authentication, in the cveate/urls.py (root url) update as shown.
from django.conf import settings
from django.conf.urls.static import static
from django.contrib import admin
from django.urls import include, path

urlpatterns = [
    path('admin/', admin.site.urls),
    path('resumes/', include('cv.urls')),

    path("api", include('rest_framework.urls', namespace='rest_framework')) # <---NEW
] + static(settings.MEDIA_URL, document_root=settings.MEDIA_ROOT) # new
We can log out and try logging in as a different user, for example as Ife.
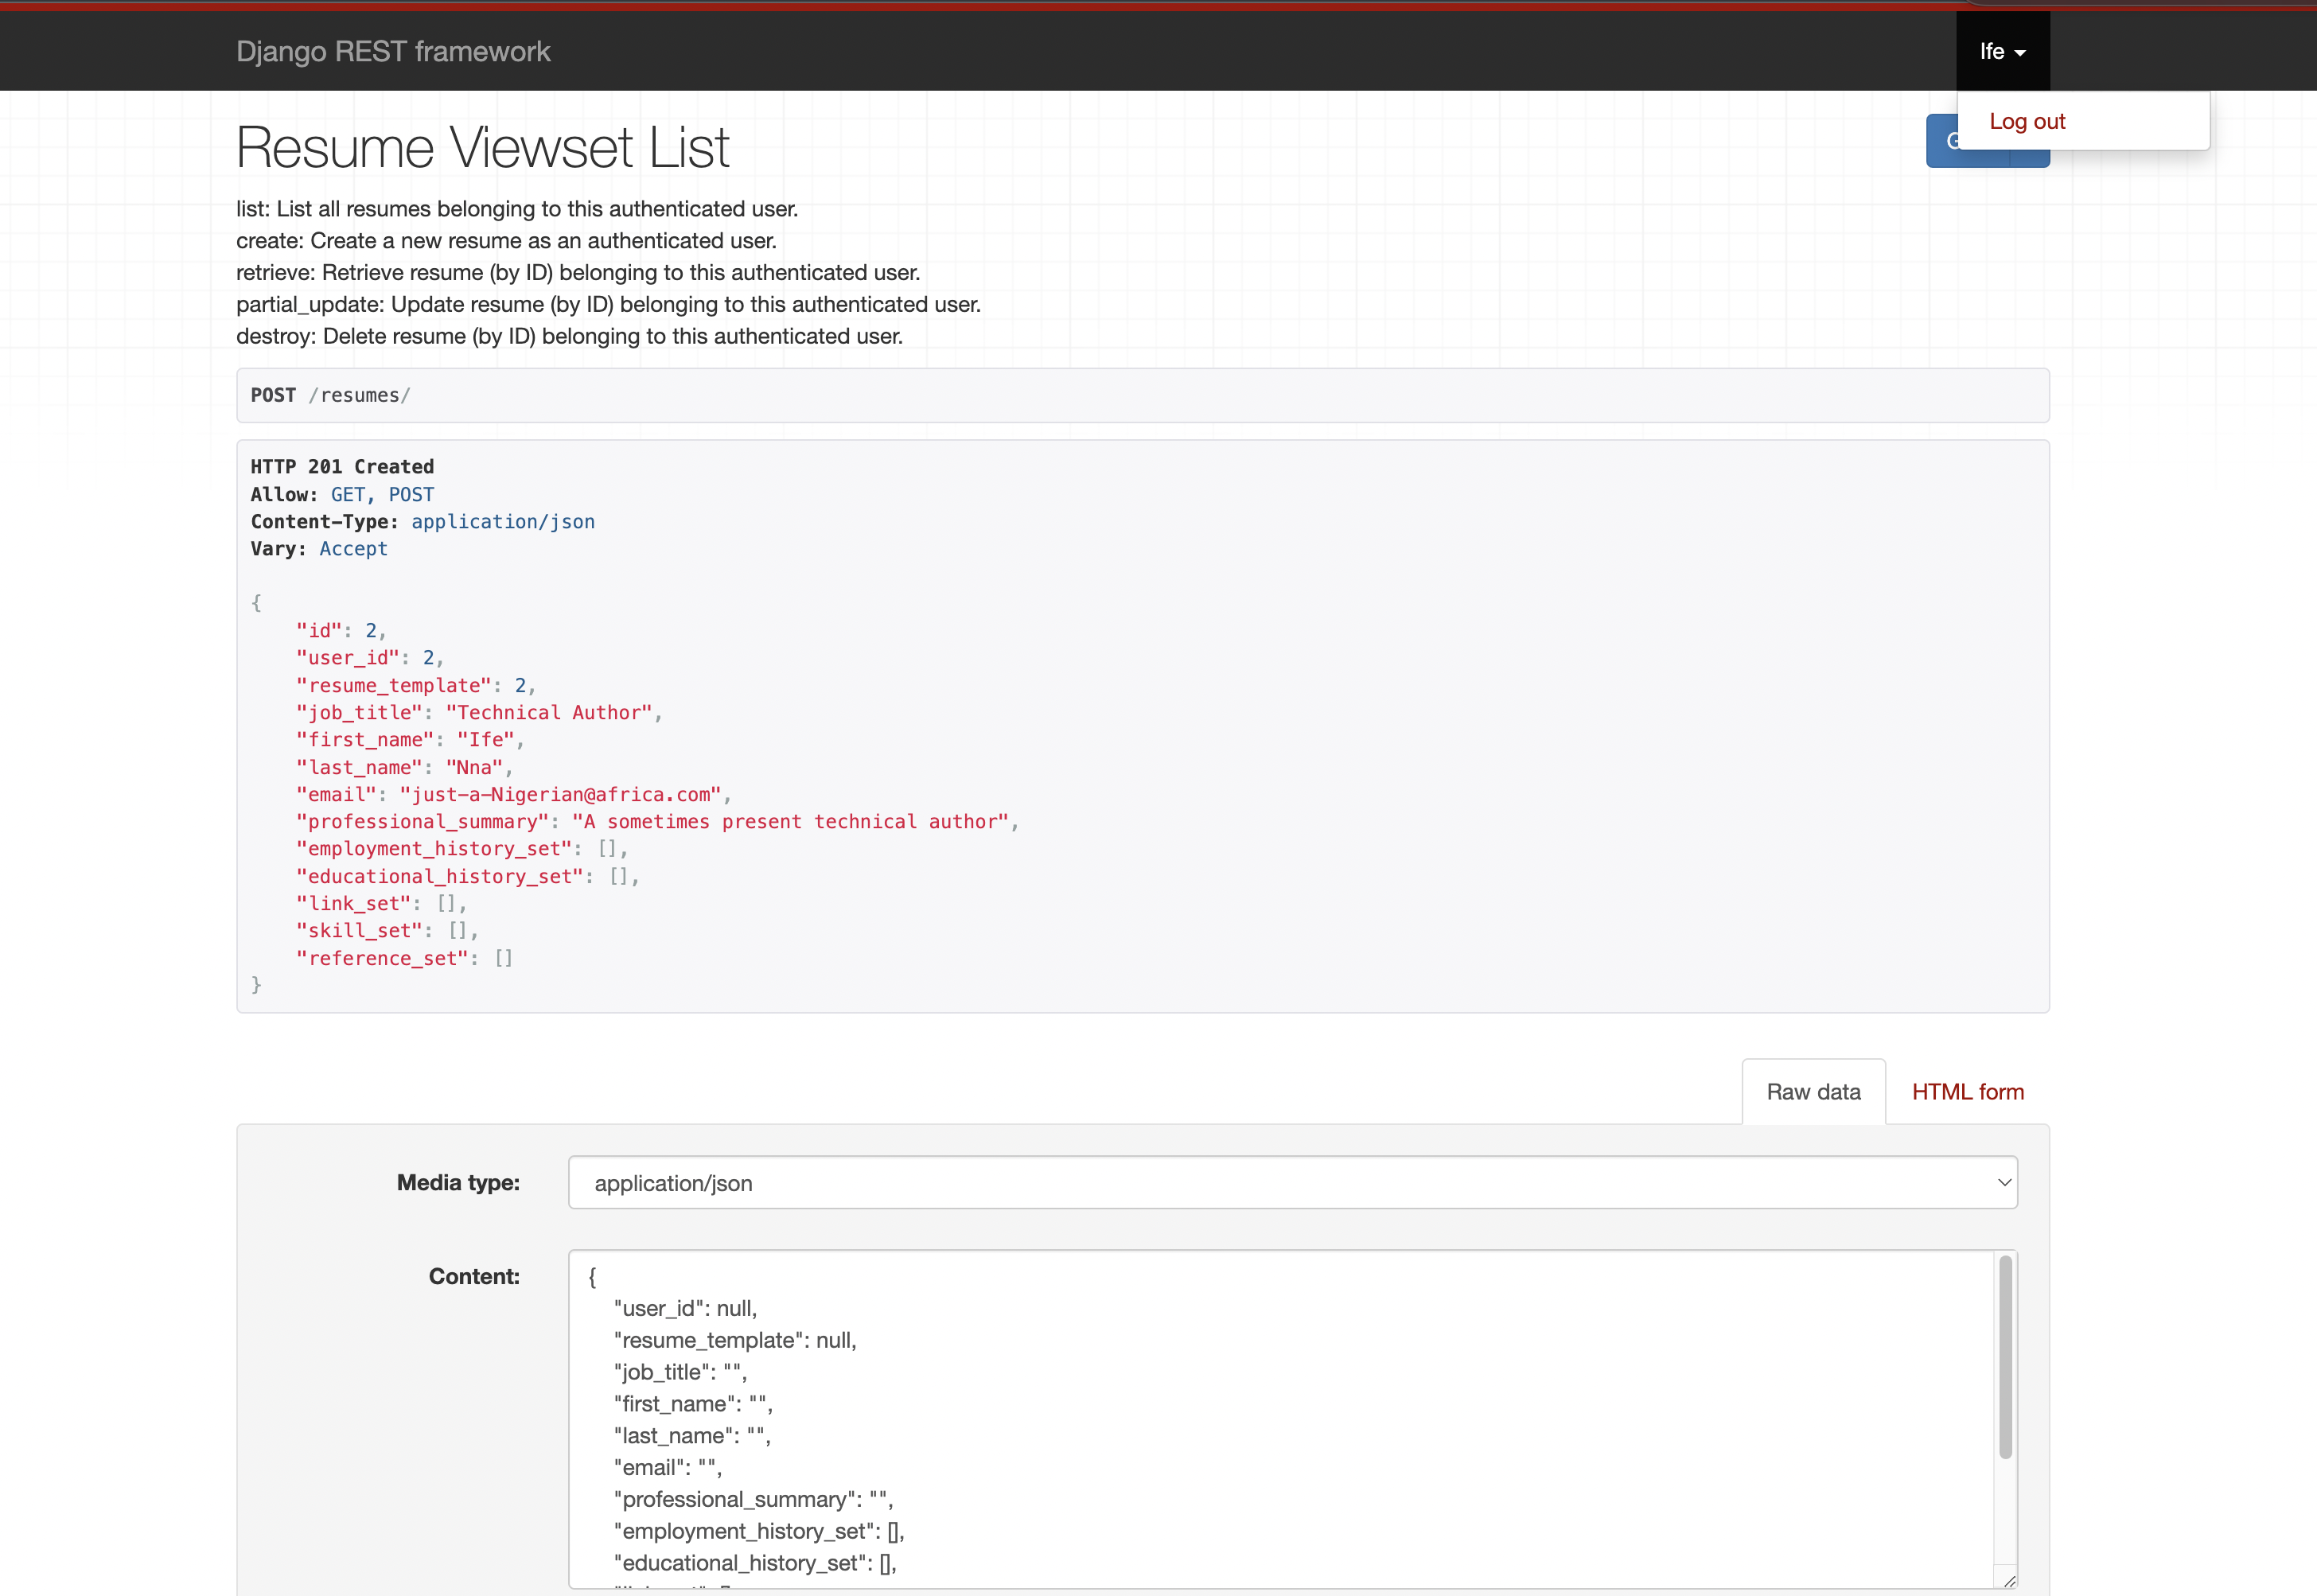
You'll see that we, as user Ife, are unable to view the previous resume that the Admin created. But if we attempt to log in as the administrator, we will see all resumes. Feel free to play around.
We can set up the resume download endpoint now that the proper logic has been established.
Download Resume
We will use the Django Render PDF package.
pip install django-renderpdf
In cv/views.py,
from django_renderpdf.views import PDFView # <--- New
from rest_framework import generics, permissions, viewsets

from .custom_permissions import IsOwnerOrAdmin
from .models import (EducationHistory, EmploymentHistory, Qualification,
                     Reference, Resume, ResumeTemplate, Skill, WebLink)

...

class ResumePDFView(PDFView, generics.RetrieveAPIView):

    """
    Generate resumes based on provided HTML files.
    Note: CSS is adviced to be in `<style></style>` tags compared to external sheet.
    A PDFView behaves pretty much like a TemplateView, so you can treat it as such.
    `prompt_download` attribute set as `True` begins download immediately
    """

    permission_classes = [
        permissions.IsAuthenticated,
    ]

    def get_context_data(self, *args, **kwargs):

        """Pass some extra context to the template."""
        context = super().get_context_data(*args, **kwargs)

        resume = Resume.objects.get(id=kwargs["pk"])

        context["resume"] = Resume.objects.get(id=kwargs["pk"])
        context["employment_history"] = EmploymentHistory.objects.filter(
            resume=resume.id
        )
        context["education_history"] = EducationHistory.objects.filter(resume=resume.id)
        context["web_links"] = WebLink.objects.filter(resume=resume.id)
        context["skills"] = Skill.objects.filter(resume=resume.id)
        context["qualifications"] = Qualification.objects.filter(resume=resume.id)
        context["references"] = Reference.objects.filter(resume=resume.id)

        # Gets the template_name dynamically
        self.template_name = f"pdf/{context['resume'].resume_template.name}.html"
        self.download_name = (
            f"{context['resume'].resume_template.name}_{context['resume'].first_name}.pdf"
        )
        self.prompt_download = True

        return context
We update our url in cv/urls.py,
from django.urls import path # <--- New

...

urlpatterns = [
    path("download/<int:pk>/", views.ResumePDFView.as_view())
] + router.urls
We use Context[NAME-TO-APPEAR-IN-TEMPLATE] to include additional data to the CV HTML/CSS template we downloaded in Part 1.
An example of the updated resume belonging to user.
Here is a resume template in HTML and CSS that you can use. Put it in the cv/templates/resumes/casual.html directory.
PS: If you run into issue with WeasyPrint (Cairo or Pango related), check out this issue as a Mac user. Similar issue for Windows users. Since django-renderpdf depends on WeasyPrint, make sure you have the prerequisites before using it.
Visit the endpoint at http://localhost:8000/resumes/download/1/. This triggers an automatic download. However, if we would like to preview the resume PDF first, in the ResumePDFView, we can set the self.prompt_download to False.
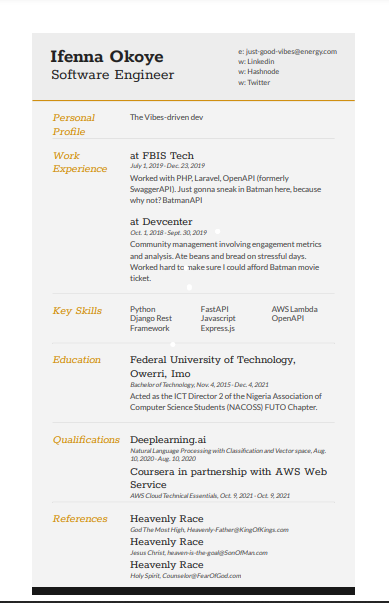
The final result result. We have a working resume builder.
Building Blocks
In this tutorial, we learned about models, serializers, and the Django rest framework request cycle. Additionally, we talked about how to view and download PDF files as well as use Django media and templates. We gained knowledge of permissions and how to set up unique permissions to control access to particular resources.
If you want to get your hands dirty, you can add authorization to the resume download API endpoint to limit resume downloads to its owners only. You can extend this project by including cover letters. Feel free to implement a stateless authentication mechanism based on JSON Web Tokens (JWT). You could also try deploying these API endpoints. I will be happy to see the awesome stuff you build! 🤩
I hope you found this tutorial series helpful. Laptop and this lady shall have a little walk around the courtyard and perhaps call on afternoon tea. Until next time!


